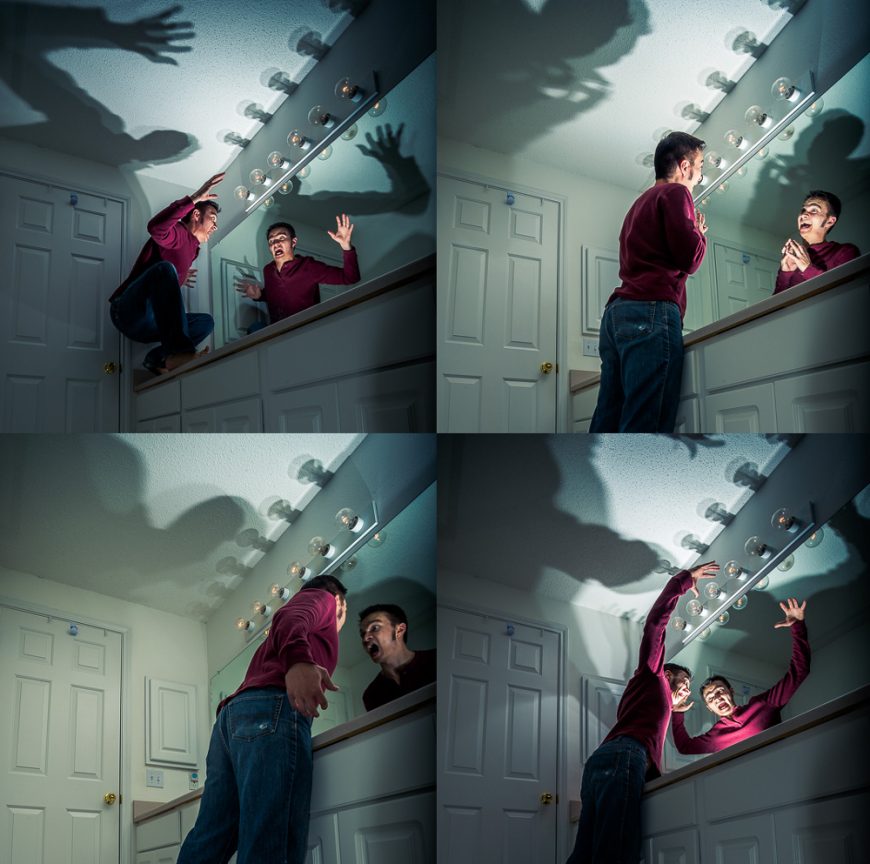
I was very surprised at the amount of attention and praise my last work, the mirror in the bathroom, received. For something so strange and experimental, I was flabbergasted by how many people seemed to like it.
That being said, a few people were wanting to know how I put it all together. While I’m wishing that I had taken more photos of the setup itself, this will have to do!
Tools In Use
- Nikon D600 (most importantly with the on-camera flash set to Commander mode)
- Tamron 17-35mm lens
- Tripod
- Remote shutter release (you don’t want to be nudging the camera every time you hit the shutter)
- Manfrotto Magic Arm (optional, but I didn’t have a lot of room to put light stands – mine has a quick release plate on one end and a superclamp on the other)
- Nikon SB-800 (with some Honl gels) in remote mode
- Adobe Lightroom (optional, but AWESOME)
- Adobe Photoshop
- Photomatix by HDRSoft (check out Trey Ratcliff’s blog, www.stuckincustoms.com, for a coupon code)
Camera & Lighting Setup
The camera and flash setups were pretty simple. I knew I wanted to shoot low and wide, so I set the camera on a tripod as close to the floor as I could and used a 17mm lens. Shooting on f/16 and manually focusing about a third into the scene, I got most everything in focus, as desired.
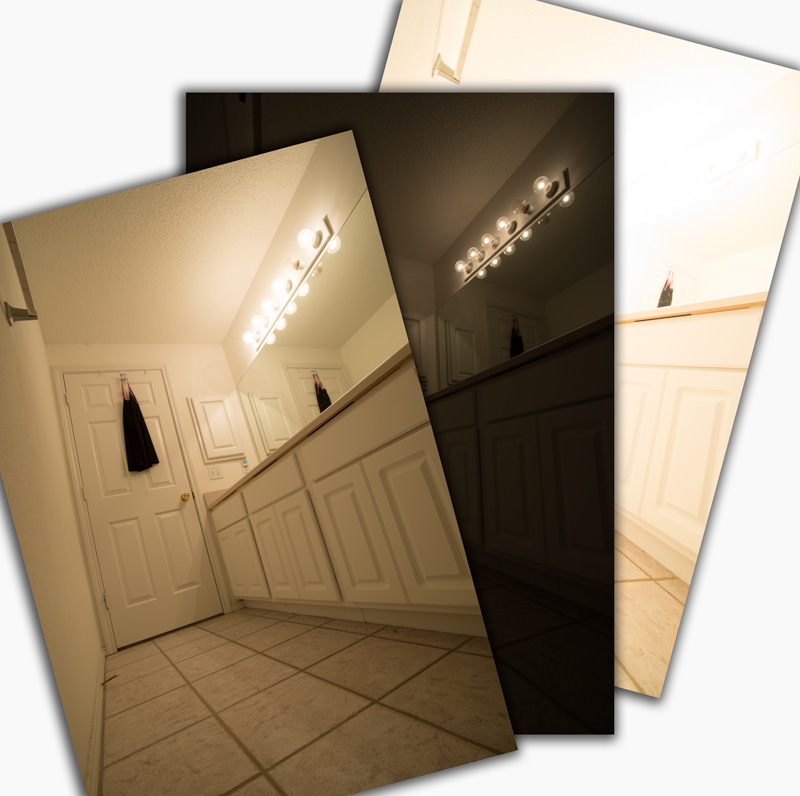
For the lighting, I used three setups for the three different portions of the shoot. I wanted a clean background plate that I could run through Photomatix to get a really grungy look. For those three bracketed shots, I just used the light from the bulbs above the mirror to get even light around the room.
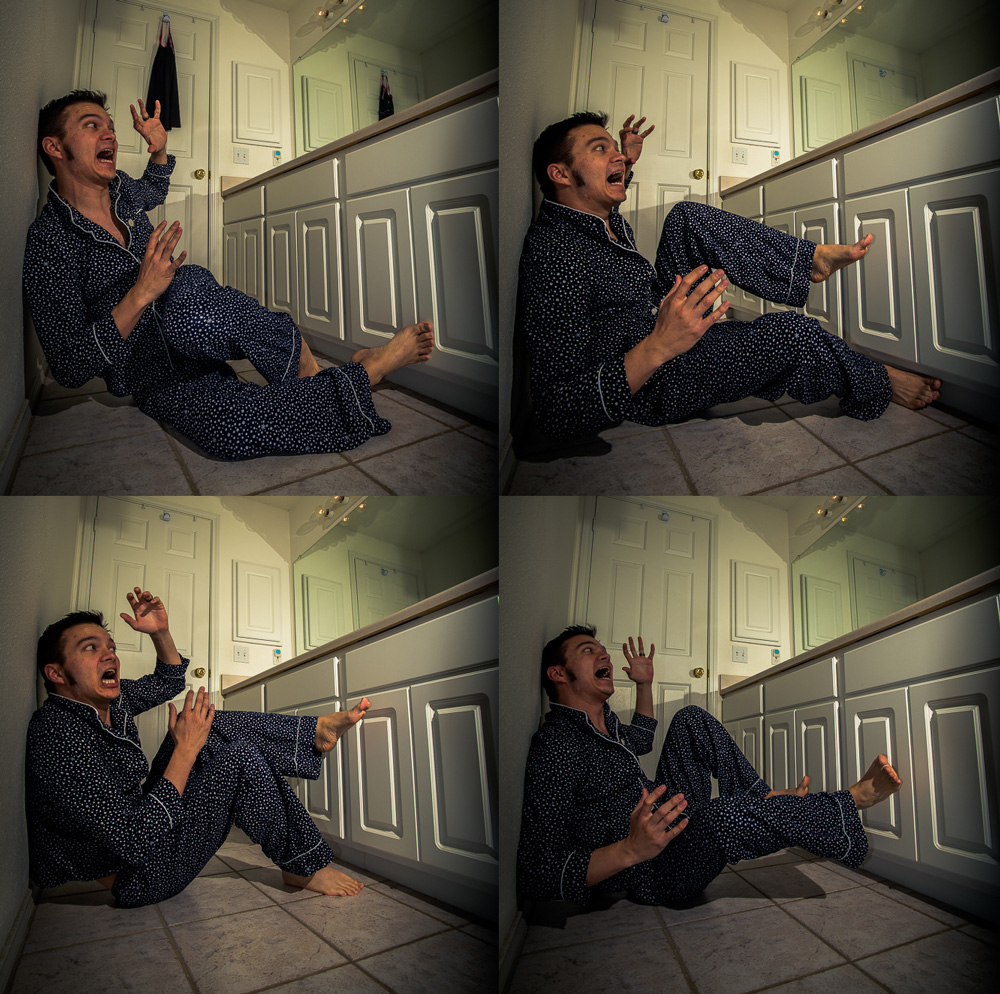
For the shots of me on the floor, I set up my speedlight to the right of the camera. Not having room for a lightstand, I hanged the flash from my shower curtain rod using a Manfrotto magic arm. I gelled the flash with a full cut of CTO to more-or-less match the ambient light. I had the camera on a timer and triggered the speedlight remotely with the on-camera flash. Despite having the camera set to take multiple shots on timer mode, it was only taking one at a time. Apparently, shooting with the on-camera flash set to commander mode disables the multiple-shot option. Weird. If anyone has a workaround for this let me know.
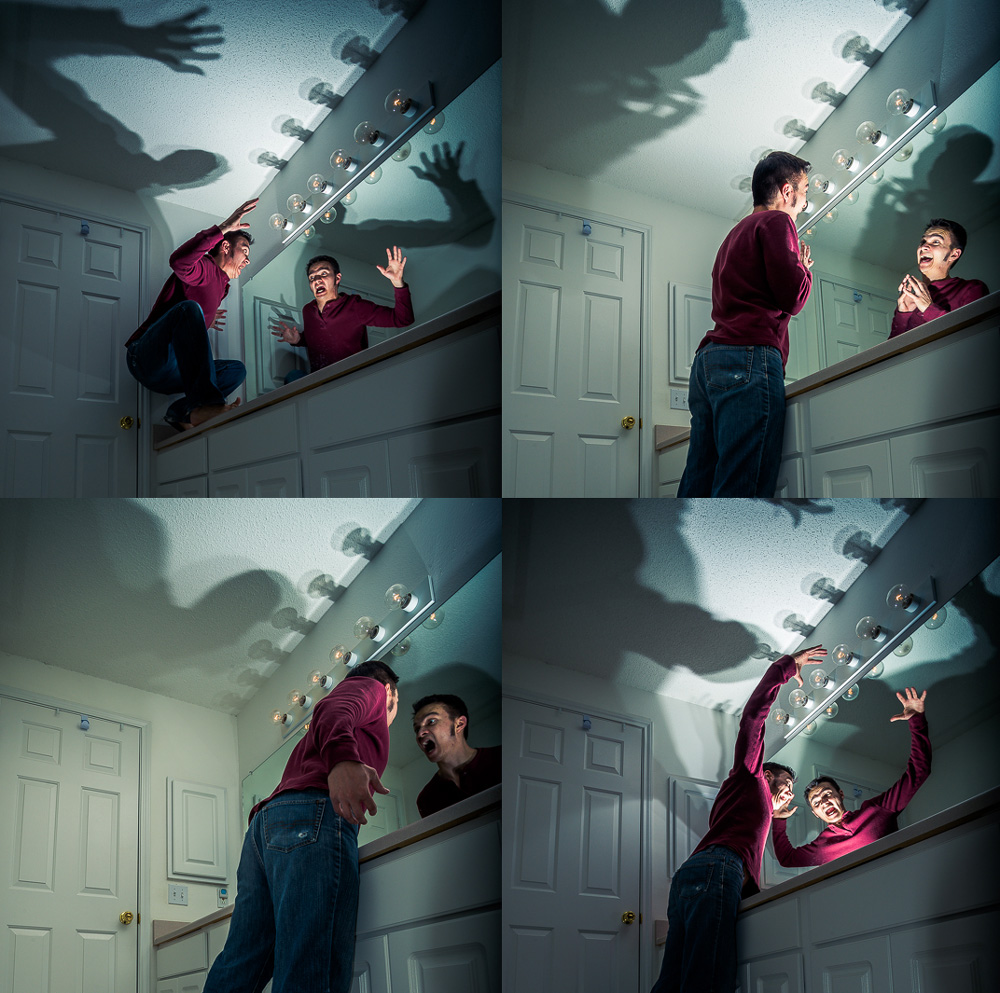
Finally, for the shots of the “mirror men,” I removed the gel and shot with the speedlight sitting on the counter facing me (still triggering it with the on-camera flash). That gave me the high-key look I wanted for my ghoulies and removing the gel gave them a coloring that stands out from the rest of the scene. This was by far the most fun. Though, again, this would have gone a lot quicker if the camera was taking multiple shots on timer mode like I told it to. (Bad camera! Bad!)
Post-Processing
Now the tedious part. The first thing I did was dump everything into Lightroom. Next, it was time to combine my background shots into one HDR plate using Photomatix. I went a little grungier than usual with this one since I was after a dramatic, high contrast look. Using the Photomatix plugin for Lightroom, the import/export workflow is seamless with the resulting TIF file ending up right back in my Lightroom catalog.
I ended up with quite a few outtakes (a few of which are seen above) that needed to be weeded out. I ended up trashing quite a few right off the bat that were ruined because of low batteries in my flash (so that’s what that annoying beeping means…). I had a lot of great mirror men candidates, but obviously couldn’t fit them all (the mirror is only so big, after all).
Next, I did some basic edits in LR to the shots of pajama me and the mirror men shots before exporting them as layers to Photoshop (along with the HDR background plate). In Photoshop with everything layered, it was easy to get things arranged by hiding/showing different layers.
I made great use of the Quick Selection tool to isolate my selves (this was particularly handy for the me I choose to be the floor model). If you don’t use it, start using it. It’s like an editable magic wand (hold the ALT key to deselect areas and click the refine button to get finer control). And of course, I used layer masks on everything to be as non-destructive as possible to my elements.
The mirror men were a little bit trickier to deal with, as I didn’t move side-to-side enough when I was shooting. The result? Most of my reflections were basically in the same spot in the mirror. That was fine, but it meant more work to arrange and fix them up. Some needed to be slightly smaller and slid to the left, others larger and slid to the right. Most of these were masked and subtracted upon using the trusty old brush tool. And I had plenty of great shadows to pick and choose from.
After all my layers had been masked out to my liking, I needed to tweak a few things. Photoshop makes this easy now using non-destructive modifiers that let you alter anything from the tone curve of a certain layer to individual photo filters. And they can each be masked individually. Great stuff. I mostly just used hue/saturation changes to get the layers to blend a little better.
I had to go a step farther with the mirror men to create “shadows.” For that, I applied a negative exposure modifier to each layer, then masked out everything but where the shadows would fall. I figured this would be less destructive than simply burning and dodging.
Smoke (I mean Steam)
Almost there! The comp looked pretty decent at this point, but there was a crucial element missing–something that would tie everything together (and help hide some of the seams). Smoke!
No, not smoke… Steam! But smoke is pretty much the same in Photoshop, I guess. This came off easier than I thought it would (never having done smoke in PS before). I found an online tut for smoke that seemed simple enough.
Here are the basics: make a new layer and grab your brush tool. Use a semi-dark gray with hard edges and go crazy making your smoke monster. Next, go dodge and burn around the edges (you want those a lot lighter) and the middle (which you want darker). Now comes the fun part! Go to Filters -> Distort -> Wave.
Oh wait, do your settings in Lightroom for external editing in Photoshop say to use 16-bit TIF files? Too bad, you can’t do the next step. Which is exactly what I found out. No problem. Just duplicate your smoke layer into a new document and change the image mode to 8-bit. Problem solved.
In the Wave dialogue box, you can leave most of the settings on default, but I messed a lot with the amplitude settings of my waves to get larger waves (I think the tutorial was working with much smaller files). Hit OK and watch the weirdness happen. Now go to Edit -> Fade Wave and you’ll get back some of your original brush strokes overlaid on top of your waved strokes. Rinse and repeat as needed to get a suitably smokey look.
Once that’s done, duplicate the layer back into your main working file. It probably won’t look perfect, but with a bit of masking and some opacity tweaking, it should look pretty smoke-like.
Or steam-like, rather.
Wrap-up
And that’s about it, folks! Easy, right? I’m sure there are things I could’ve done differently that would’ve saved me some time, so I’d love to hear your thoughts and comments!
To see the final product on flickr, click here. And at my uncle’s request, I’ve added it for sale on my site (click the Buy Prints link above).
Enjoy!
